As a cybersecurity analyst you need various tools to log activity and analyze network traffic. It is essential for cybersecurity professionals to view and analyze and view nework traffic with a granual and articulate approach – to thoroughly investigate any discrepancies and eradicate any issues and report malicious activity.
Tools like Wireshark, Tcpdump, Capsa Free, Snort etc are some of the powerful network protocol analyzers which can help a cybersecurity architect or analyst to investigate an organization’s network traffic.
It is vital for cybersecurity trainees to understand the software complexities and various wireshark filters to to fine-tune their analysis and focus on the data that matters most.
Understanding Wireshark Filters
From my understanding, Wireshark and other packet analyzers are like strainers which helps cybersecurity teams to filter
and sift through the vast sea of network packets.
Wireshark fastens the process of zeroing down on a specific information. Whether you’re troubleshooting network issues or hunting for malicious activity, filters (or command) are your key to precision and also a huge factor in singling out the compromised information.
Some of the Basic Filters
- IP Address Filtering: ip.addr == 192.168.1.1
- Protocol Filtering: tcp or udp
- Port Filtering: tcp.port == 80 or udp.port == 53
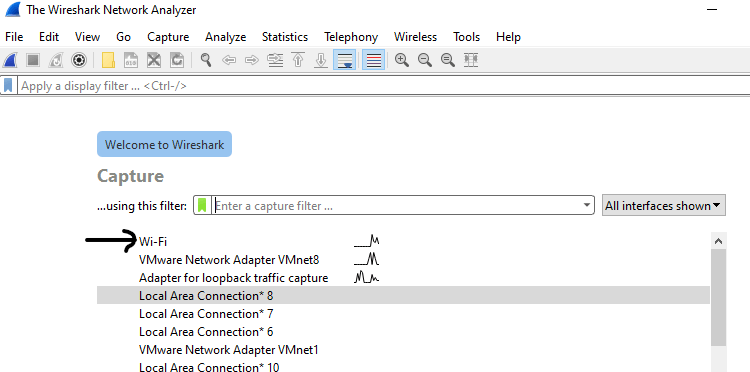
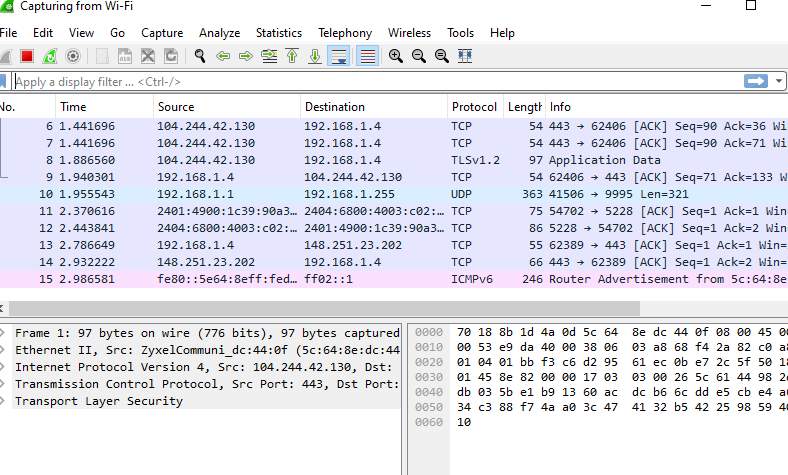
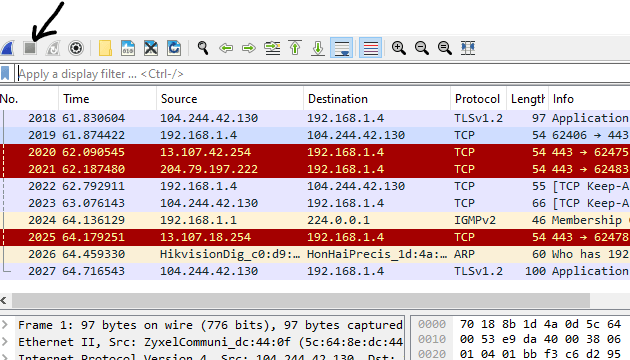
So, I’ve given few examples in the below screenshots that I took on my Windows 10 laptop.

You need to know that the device and the laptop (where Wireshark is installed) should be on the same Wi-Fi network. Otherwise, you’ll not be able to capture packets from the device. You can either use Wi-Fi or wired connections to start the packet capturing using Wireshark tool.

Complex Filters:
- Combining Filters: ip.addr == 192.168.1.1 && tcp.port == 80
- Negation Filters: !(ip.addr == 192.168.1.1)
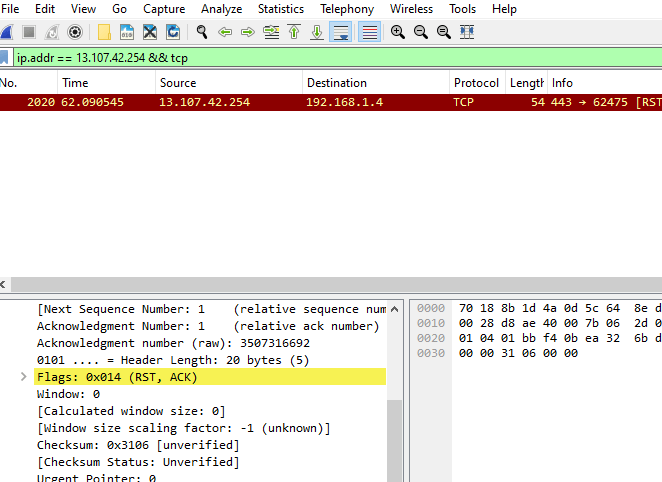
When you use the tcp filter with the IP address it filters out the targeted device and only captures the tcp traffic. As TCP is the most fundamental Internet protocol for reliable data transfer, it is recommended to analyze the tcp traffic packets to understand the data exchanges between the source and the destination.

In my cybersecurity internship, I have learned that most malicious activities occur over TCP connections, hence TCP network traffic analysis is recommended.
Attacks like SYN/ACK floods and connection hijacking are more prevelant over TCP connections.
Display Filter Expressions:
- Logical Operators: && (and), || (or), ! (not)
- Comparison Operators: ==, !=, <, >
By mastering these filters, you can tailor your Wireshark analysis to focus on specific hosts, protocols, or even individual conversations within the network.
Customizing Display Options
Wireshark offers a plethora of display options to enhance your analysis and make sense of complex network traffic. Understanding how to customize these options is crucial for gaining actionable insights.
Colorizing Packets:
- Protocol-Based Coloring: Assign distinctive colors to different protocols for quick visual identification.
- Rule-Based Coloring: Set up custom colorization rules based on specific criteria, such as packet length or source/destination IP.
Column Customization:
- Adding and Removing Columns: Tailor the packet list view to display only the information that matters most to you.
- Column Sorting: Arrange columns to prioritize important details, such as time, source, or destination.
Packet Marking and Annotations:
- Setting Packet Markers: Highlight packets of interest for future reference.
- Adding Annotations: Provide context by adding your notes directly within the packet capture.
Putting It into Practice: A Scenario-Based Example
To illustrate the power of Wireshark filters and display options, let’s walk through a common scenario: identifying suspicious activity from a specific IP address. By combining IP address filters and colorization, you can quickly pinpoint and analyze relevant traffic, streamlining your investigation process.
ip.addr == 192.168.1.2 && tcp
In this example, we filter packets from the suspicious IP address (192.168.1.2) and focus specifically on TCP traffic. Applying a custom color for this filter can make it stand out, aiding in rapid visual identification.
In my experiment I used ‘ip.addr == 13.107.42.254 && tcp’ which was my home security camera. I wanted to see the source and destination of the traffic.

Also, you still have to decrypt the captured traffic in the Wireshark using a key, which will be explained in my next tutorial.
Conclusion
In a nutshell, for cybersecurity professinals Wireshark and other packet analyzer tools are potent security tools to investigate and
navigate the intricacies of network traffic.
To succeed as a cybersecurity professional you need to master these features and experiment with these filters and options according to the specific use case.
If you need any help with the different filters and other network analyzer tool, please contact me through the contact me page and I would try my best to find a solution for your question.


